Archive for the ‘Sewing’ category

Day Two: Original Sewing & Quilting Expo

March 12, 2010

I had two classes today.  The first class was Core Sewing Skills with Cynthia Guffey.  I think the class would have been a lot better if there weren’t so many people in the class.  Don’t get me wrong, the information was great but you really couldn’t see what she was doing.

The second class was Dozen Favorite Construction Techniques with Peggy Sagers.  I got there early and sat in the front row.  Peggy’s back ground is in ready to wear and some of the advice she gives is opposite of the big Four pattern instructions.  She sewed in a sleeve right in front of the class using the flat insertion method.    The sleeve is on the bottom so that the sewing machine feed dogs can do the easing for you.  She did not sew a  double row of basting stitches and she used ONE pin at the shoulder seam.  I’m so trying that. This was a great class.

I like her factory techniques and I know I’ll use them to make my clothes.  I’m also interested in couture techniques but I would not couture my everyday garments.  I know I’ll use both techniques.

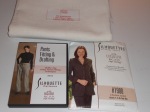
Okay so here’s the haul today.

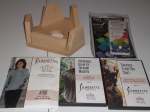
I bought these items at the Silhouette Patterns booth.

One yard of Tie Interfacing.  In the class today, Peggy Sagers demonstrated how to use this interfacing on sleeve caps in jackets.  When I conquer blouses, I’m working on jackets. $9.50

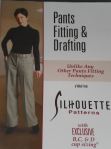
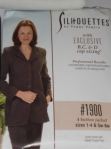
Pants Fitting & Drafting.  I loved the DVDs I bought yesterday so I bought another one today $29.99.  When you buy this DVD at the expo, you get to select a pattern.  I got pattern 1900 (4 button jacket).  Peggy wore her’s today and it was pretty.

I bought my muslin to the expo, hoping to sucker someone into helping me..err..I mean ask for help.  I received great advice from a member of the Atlanta chapter of the American Sewing Guild.  She makes costumes and likes couture sewing.  Another member recommended a DVD that her group watched recently, Full Busted?  Sew Clothes that Fit. I ordered the DVD tonight.   I really should go to more meetings.

Tomorrow is the last day of expo.  I might go to Vogue Fabrics and buy the wonderful blue, sheer silk for $5.99/yard.

Day One: The Original Sewing & Quilt Expo Atlanta, Georgia

March 11, 2010

Thursday March 11, 2010

Day One

Rain + Atlanta traffic + 9 am class = Late to Class

My first class was The Gap! which was taught by Peggy Sagers of Silhouette Patterns. This was a great class which taught me more about draping and fit. It wasn’t a draping class but I could understand the principles of draping now that I’ve been sewing for over a year. I missed part of the class but I had a few “ah-ha” moments. I’ll be using my French curve a lot more. Peggy explained that most gaps are due to L, C or D. L=length, C=Circumference or D=depth (dart). L,C, D is also the sequence of making adjustments. Add or subtract length, then circumference then depth. It was a one hour class.

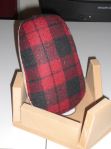
This was the only class I’d preregistered for the day. After her class, I signed up for another class she was teaching at 2:30pm. I then went into the Exhibit Hall. Because I’d attended Expo last year, I made a list of things I wanted to buy and put the list on my Blackberry. There were more exhibitors who catered to quilters but there were some vendors who had items for garment sewers. The first place I went was to Golden Hands Industries, Inc. (800-998-1392). Last year, I bought a tailor board, this year I bought I ham holder for $22.95.  I can take that off my sewing wish list.

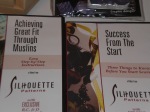
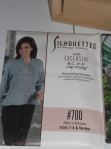
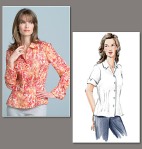
Next, I went to the Silhouette Patterns booth and bought two DVD’s. Success from the Start and Achieving great fit through Muslins. They had a special if you bought the Success from the Start DVD, you got one pattern free so I chose pattern #700, Alex’s blouse. The pictures don’t do the patterns justice. I learned this because I watched the fashion show. What a difference! $74.10

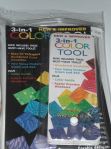
I visited the Gadgets Galore at Thread and More.com (www.threadandmore.com) and bought the New & Improved 3-in-1 Color Tool by Joen Wolfrom. This tool was mention on Beth’s blog, The Rusty Bobbin: Inklings. I liked her idea so I had to have one.$16.95

The next class began at 2:30pm…I wasn’t late for that one :). Making Sheers Simple was also taught by Peggy Sagers. She had 3 great tips for sewing with sheers. I have a few sheer fabrics so I’m going to use her tips in the spring to make summer tops. That was my day. I came home and watched the DVD’s. I still don’t know about my blouse. Something is wrong but I don’t know how to fix.

So here’s the haul ….

Sewing Wish List

  1. Large rotary cutting mat
  2. Personalized tags
  3. Ham holders
  4. Sleeve board and cover
  5. Take a fitting class
  6. Narrow Folding table
  7. Coverstitch machine

I’m going back to Expo tomorrow for more classes. Hopefully, I’ll learn something that will help me with blouse patterns.

Why do they DO this to us!

March 4, 2010

Warning…rant ahead!

I use to wonder why I didn’t sew well. Why couldn’t I make all the steps in my sewing project look like the illustrations in the sewing instructions of the big 4 pattern companies. I don’t wonder anymore. I’m convinced the sewing companies are trying to make beginners ALL sewers lose their ever loving mind trying to follow the asinine instructions. ::snarl:::

So what sent me on this rant? The instructions to add the collar band and collar to McCall’s 5145.

The first thing that annoyed me was they forgot to label step 16 for ALL VIEWS. Step 16 constructs the collar and since this is a blouse pattern… well… all views need a collar…hello!

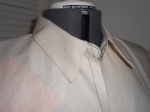
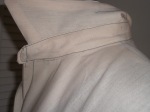
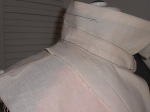
Next, came the construction of the collar band & collar to the blouse. Yuck! I followed their instructions and the collar looked like a two year old got a hold of a sewing machine. I didn’t take pictures because it was just that bad.

I’m so glad there are sewing bloggers who don’t mind telling it like it is when it comes to sewing pattern instructions. I had no problem throwing out McCall’s instructions and off to my sewing library I went.

I looked through Shirt Making by David Coffin, Power Sewing by Sandra Betzina and The Busy Woman’s Sewing Book (Revised Edition) by Nancy Zieman and Robbie Fanning. Of the three books, The Busy Woman’s Sewing Book had the most clear and simple instructions.
I used McCall’s instructions to make the collar and The Busy Woman’s Sewing Book for everything else.

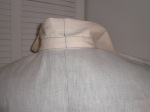
I’m making a muslin with the intent of using the muslin as my pattern later so I didn’t trim the seam allowances at all.  I also thread traced the grain lines.  Here’s the results.


I don’t know why the center back seams are lining up.  Could it be operator error?  🙂

I’m happy with the results.  The blouse is rolling along.  I have to insert the sleeves  :::insert the music from the shower scene in the movie PSYCHO::::  I’m determined to learn how to sew sleeves without puckers or pinches this year.  Send good thoughts my way, please.

I think I need to to a FBA also.  Stay tuned.

Cutting and Marking

February 25, 2010

I’ve cut out and marked the muslin for McCall’s 5145. It’s been slow going because I haven’t been feeling very well. I hope to get more sewing done this weekend.

I give up!

February 16, 2010

I’m giving up on Vogue V7903. 

I just think this pattern doesn’t work for me.  I got the back alteration to work. It’s the sleeves and armscye that isn’t working for me. Maybe it’s the style that doesn’t work. Whatever. I’m not going to give up on shirt patterns. There’s got to be a shirt pattern that works for me.

I’m going to work on McCalls’ 5145 view B


White flag Photo Credit: This is a file from the Wikimedia Commons. The description on its description page there is shown below. Commons is a freely licensed media file repository.

Tissue Fitting

February 7, 2010

I’ve had the book Fit for Real People by Pati Palmer & Marta Alto for at least two years.  I’ve used a few of the pattern alteration techniques in the book but I’ve never tried to tissue fit.  Tissue fitting just didn’t appeal to me until last week.

I’ve been having problems with my sleeves …or so I thought.  I raised the armscye (armhole) on the pattern make yet another muslin that didn’t fix the problem.  This was my 3rd or 4th muslin mind you.  Then, I decided to try tissue fitting.  I read pages 29, 30, 76-81.  I also watched Marcy Tilton’s Tissue Fit youtube videos and Gertie’s Tissue Fitting YouTube videos.  I tried on my altered pattern and realized that the pattern didn’t reach my center back.  Hmmmm.  Now, I have narrow shoulders and apparently a wide back who knew?  I did not use the alteration technique in Fit for Real People because I would have had to add more length at the shoulders where I don’t need it.  So, I added the width to back at the neckline and created a center back seam.  I don’t know if this will work because I’ve added length to the neck.  I also looked in my Vogue Sewing book for back alterations.  They show a shoulder dart.  I’ve never seen one on my ready to wear blouses.  Adding a shoulder dart might be the way to go. 

Okay so even with the added width, I’m still having trouble with the right sleeve.  It’s a miracle that I didn’t rip that muslin off and set it on fire last night.  I’m so freakin’ frustrated!!!!

Wadder – Butterick 5047 Camp Shirt & Great thread tracing video

January 25, 2010

Wadder

I did a FBA on Butterick 5047 camp shirt and all I can say is ugh.  The bottom became really flared and the shirt made me look quite matronly.  That’s NOT the look I’m going for just yet.

All isn’t lost though, I did learn to match stripes with this pattern.  I also raised the armscye with this pattern.  I think I’m going to do that with Vogue 7903.

I’m still need to learn how to fit sleeves.    I”m going to work on Vogue 7903.  I’ve already made the following changes to the pattern:

an FBA

shortened shoulder seam

add length to shirt

I hope to figure  this sleeve thing out soon.  I found the article “20 ways to Improve Your Sewing” from the Threads website.  I’m going to try Number 13.   I probably need to print the article and hang it up in my sewing room 🙂

Thread Tracing Video

I’ve heard of thread tracing and even seen examples of thread tracing from blogger like Tany and Ann.  I had no clue how to do it.  I found this video from Otis College and it really helped.  Thread tracing is the last of the three types of hand stitching shown.

I’m really glad their on YouTube.  I would love to take a class there.

I think I will still have to use tracing paper or chalk to mark the lines and dots when doing thread tracing…especially for muslins.

Question?

So do any of you do thread tracing and do you still have to tracing pattern markings with chalk or tracing paper?

Not right…

January 23, 2010

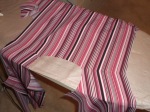
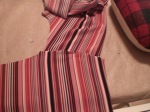
I made a muslin of Butterick 5047 camp shirt using striped fabric.  The goal was to figure out how to match stripes and find an easy shirt pattern.   I think I did figure out stripes.

I had to cut out one sleeve and front – twice.    That’s okay because I had more than enough fabric.

What isn’t right is the fit.

1.  I’m going to have to do a FBA.  That means adding a bust dart.  The pattern already has fisheye darts and I don’t know how to rotate the bust dart.

2. My biceps are big.  I’m going to have to add more fabric.  This is kinda of depressing because this means I’ve gained weight 😦  I don’t know how to alter sleeves.

I’m debating…should I put this pattern aside and go back to the Vogue 7903 pattern I was working on last year.  With the Vogue 7903, I have the fit in the bust figured out.  It was the sleeves that was kicking my rear.

The Butterick pattern is simple to make.  It helped that I had Connie Crawford’s book Guide to Fashion Sewing (3rd edition).  The pattern instructions on attaching the collar made no sense to me.  The book has great drawings.  I also had Ms. Crawford’s DVD Studio Sewing Skills Volume 4 which features the 5047 pattern.  Do I want to mess with the fit?

Decisions, decisions.

Simplicity 2598 View E Knit Top

January 8, 2010

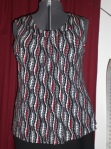
Simplicity 2598 Knit Top

Pattern Description: Women’s Knit top and Cardi-Wrap with Front Variations.  This is the plus size version of Simplicity 2603

Pattern Sizing: 18W to 32 W

Did it look like the photo/drawing on the pattern envelope once you were done sewing with it? Yes

Were the instructions easy to follow? Sort of.  I follow Ann’s blog (Gorgeous Fabrics).  She blogged about the instructions to attach the collar band and I like her instructions.  They made more sense to me.  You can find her tutorial here.

Here’s a closeup of my collar band.

I also follow Pam’s blog (Off The Cuff ~Sewing Style~).  She blogged about hemming knits.  You can find her tutorial here – scroll down to 01/01/2009 entry Perfect Hems Every Time!  Using Pam’s tutorial enabled me to hem the top with getting the tunneling that I usually get when I sew knit fabric.

What did you particularly like or dislike about the pattern? The pattern is simple and using Ann’s and Pam’s tutorials made it a breeze.

Fabric Used: Poly/Rayon Knit from Gail K’s in Atlanta

Pattern alterations or any design changes you made: Other than using the tutorials mentioned above, I still had to do a FBA.  I think I need to more adjusting on the FBA.

Would you sew it again? Would you recommend it to others? Yes.  I like the wide shoulders which cover bra straps.

Conclusion: A great pattern and good wardrobe builder for the spring and summer.

Hemming Knit Top

January 7, 2010

A better shot of puckers in fashion fabric

Puckers on Knit hem

Puckers on Knit hem

(click on photos to enlarge)

This post is a reminder for me and to document how I got a pucker-free hem for Simplicity 2598 View E top.

First, I used Pam’s tutorial (scroll down to 01/04/2009 entry Perfect Hems Every Time!)

I used 1 1/2 inch hem so I cut the Sulky Solvy in 1 1/2 inch rolls and fused. I practiced on a scrap of fashion fabric and I’m glad I did. The first attempt produced puckers. I tried it again using my walking foot and that worked. It’s hard to tell that there are puckers in the hem but believe me there are.

Here’s what I learned. If I want the hems on my knit garment to look great.

1. Use Sulky Solvy and Pam’s tutorial.
2. Use my walking foot

Parting Shot:

Sherried Tomato Soup and Buttermilk Cornbread

It’s very cold here in Atlanta. The forecast call for SNOW!  Dinner tonight is left over Sherried Tomato Soup and Buttermilk Cornbread (that I almost burned because I was writing this post.) Note to shelf – don’t cook and sewing at the same time.